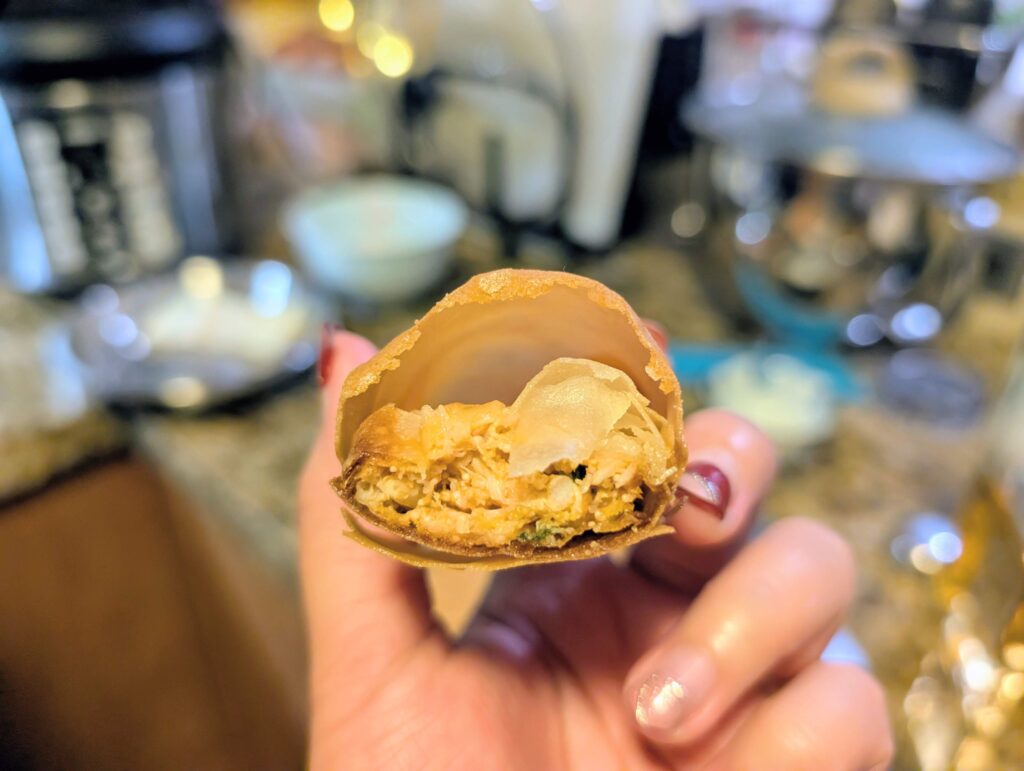
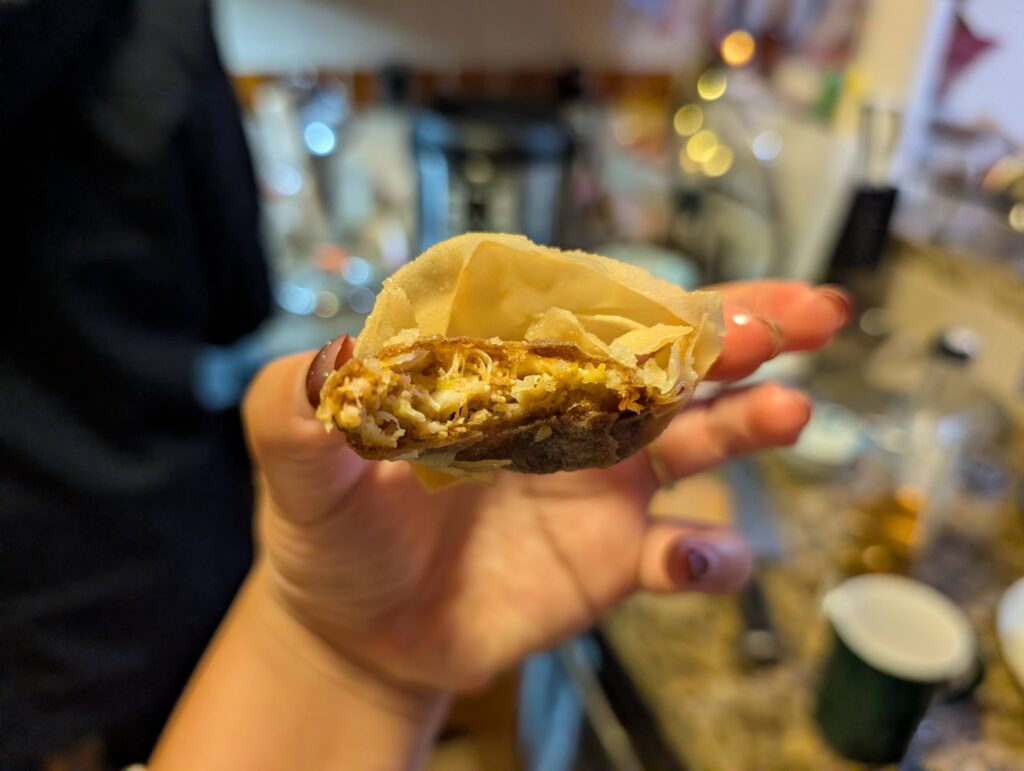
The spring roll with an air pocket is my favorite dish at Fuhuihua, the new and buzzworthy Chinese fine-dining restaurant in San Francisco. When I first saw Chef Ge serving a spring roll, I was skeptical, how different could it really be? But the moment I bit into it, the top layer cracked gently like flaky pastry. Beneath that dramatic air pocket, Chef Ge had hidden the ocean itself: crab leg, crab roe, fish maw, and fish fin. The flavors were gentle yet deeply umami, blooming slowly with each bite. In addition, contrary to the flaky layers, the filling is very moist and juicy. Despite being deep-fried by pouring hot oil over the roll to inflate the air pocket, the spring roll was remarkably light and not oily at all.
While most of Chef Ge’s dishes are far too complex and delicate to reverse-engineer at home, I was determined to at least attempt this one, using crab meat, mentaiko, and uni. The result was humbling. Achieving a smooth, evenly puffed air pocket, matching color and texture on both sides, creating a golden yet not overfried crust, and a non-oily finish turned out to be much harder than it looks.
Below is my best attempt, along with tips and common pitfalls, for those brave enough to try frying an air-pocket spring roll at home.
Ingredients
- Wheat-based spring roll wrappers (for deep frying)
- Spring roll filling (e.g., crab meat, roe, uni, fish maw)
- Cornstarch
- Neutral frying oil
Instructions
- Step 1: Thaw the deep fry spring roll wrappers at room temperature for about 15 minutes. Keep them covered to prevent drying out. Make sure you use the wheat wrappers rather than the rice wrappers for steaming.
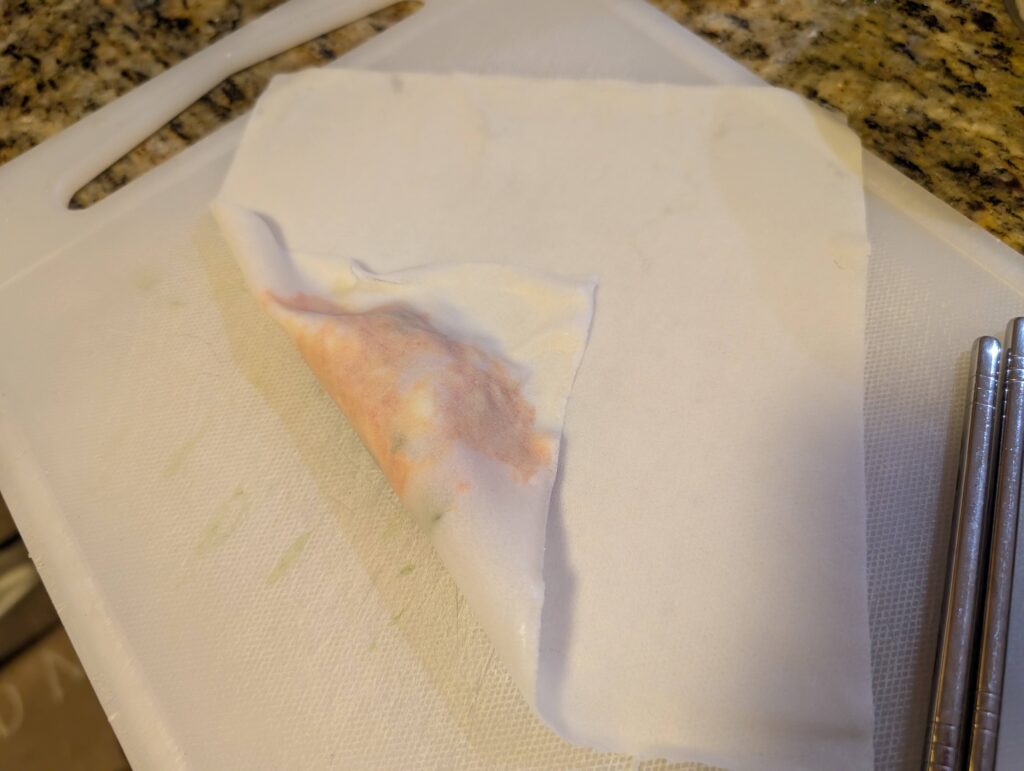
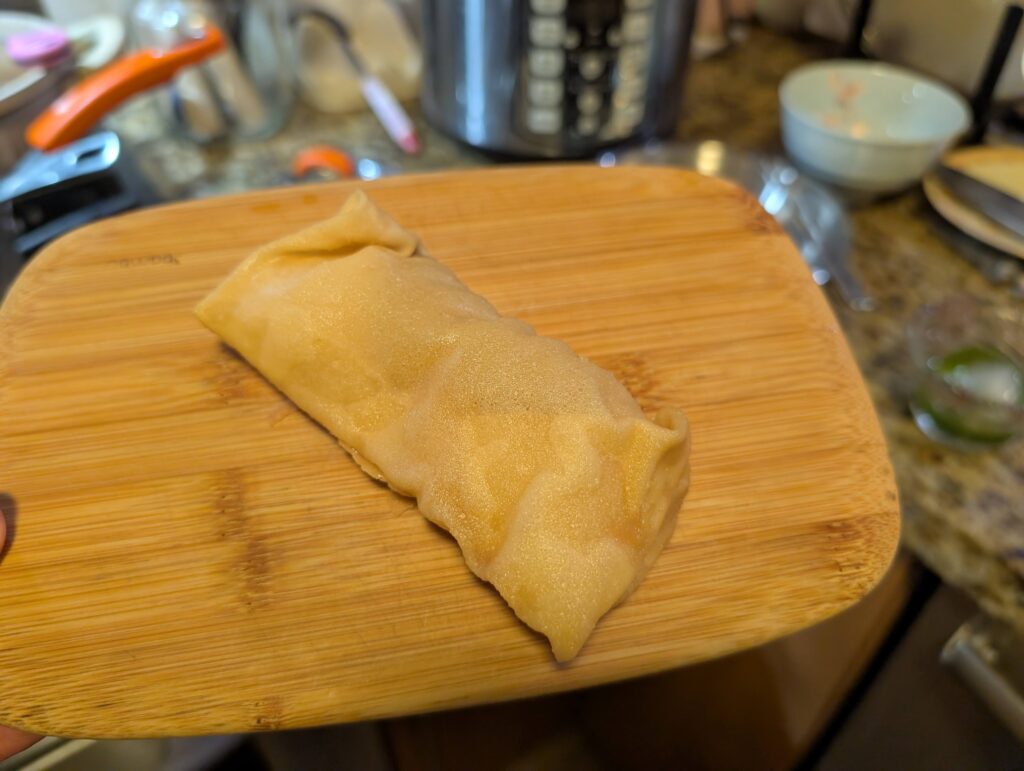
- Step 2: Place one wrapper on a work surface in a diamond orientation (corners pointing up and down). About one-third of the way up from the bottom corner, place roughly 1 spoonful of filling (layered ingredients tastes better than mixed ingredients). Do not overfill, as excess filling will weigh the roll down, create a greasy texture and prevent proper air-pocket formation.
- Step 3: Mix 1 teaspoon cornstarch with 1 tablespoon water. Brush the bottom corner with the cornstarch slurry, fold it upward toward the center of the wrapper, and press firmly to seal.
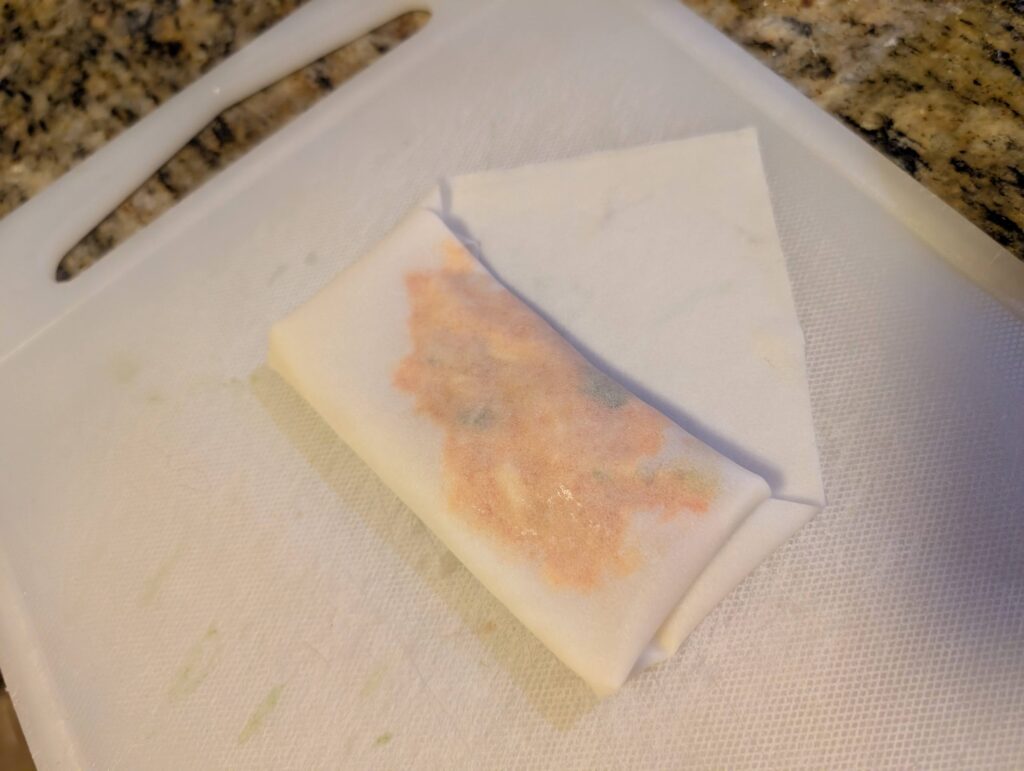
- Step 4: Brush the left and right corners with cornstarch slurry, fold them inward toward the center, and press firmly to ensure they stick.
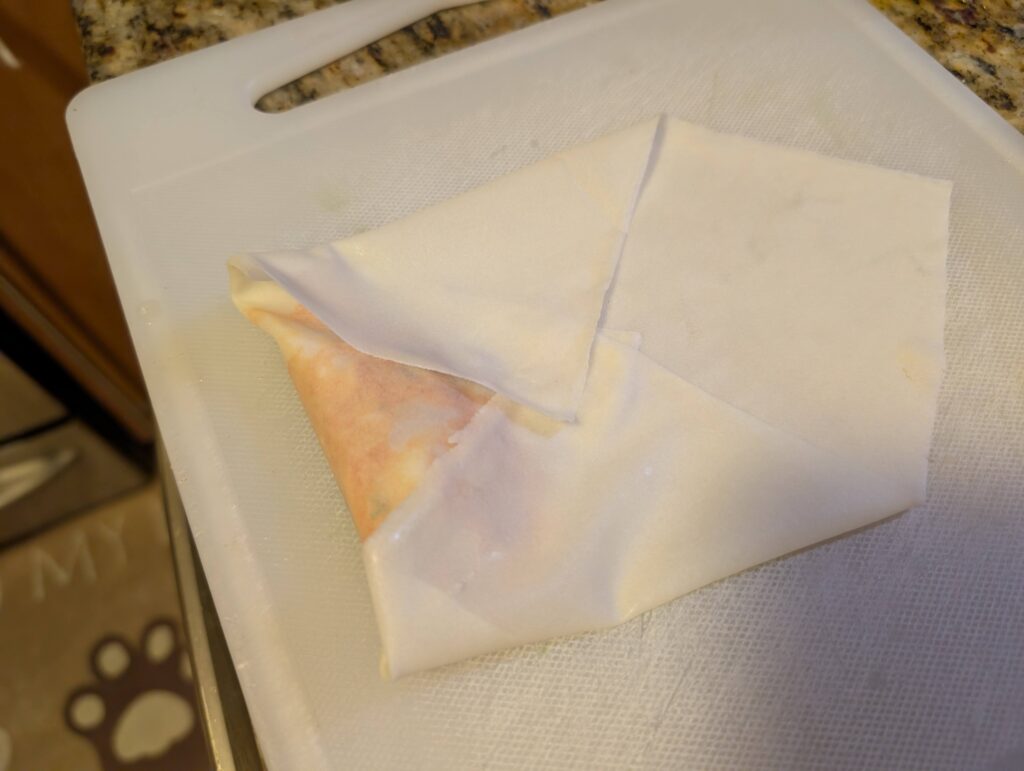
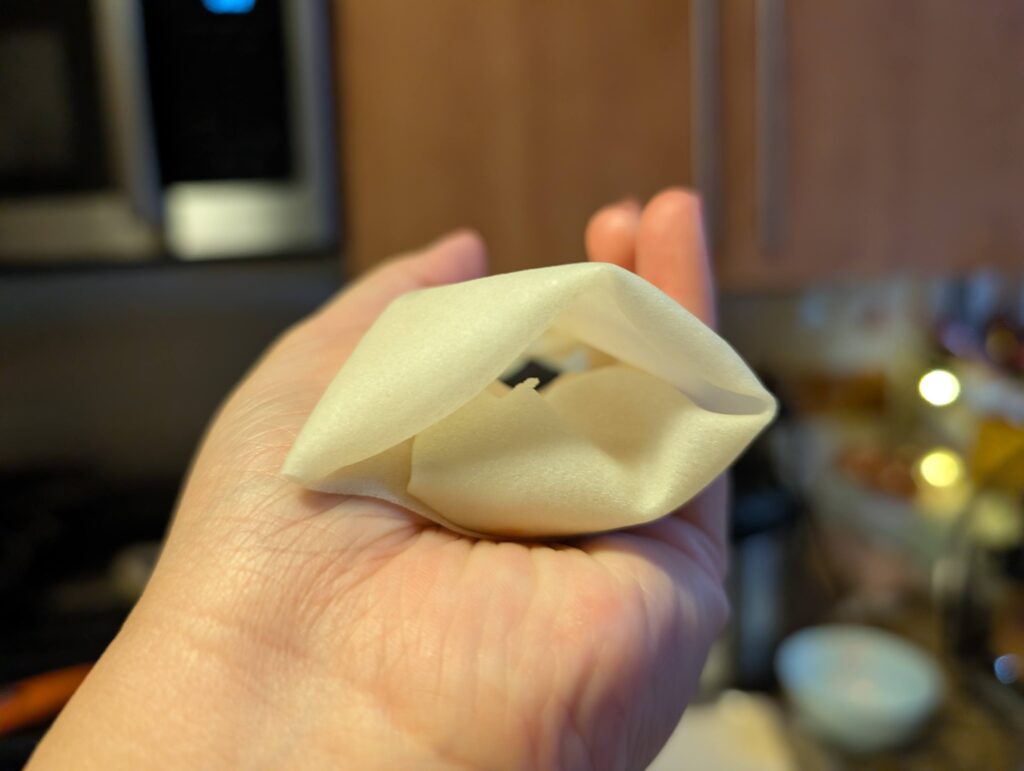
- Step 5: Brush the top corner with cornstarch slurry and roll it down to seal the spring roll. Gently insert a finger through the center to confirm there is a clear tunnel—this space is essential for forming the air pocket. Do not let the wrapped spring roll sit out too long before frying, or the wrapper may dry out and crack in the oil.
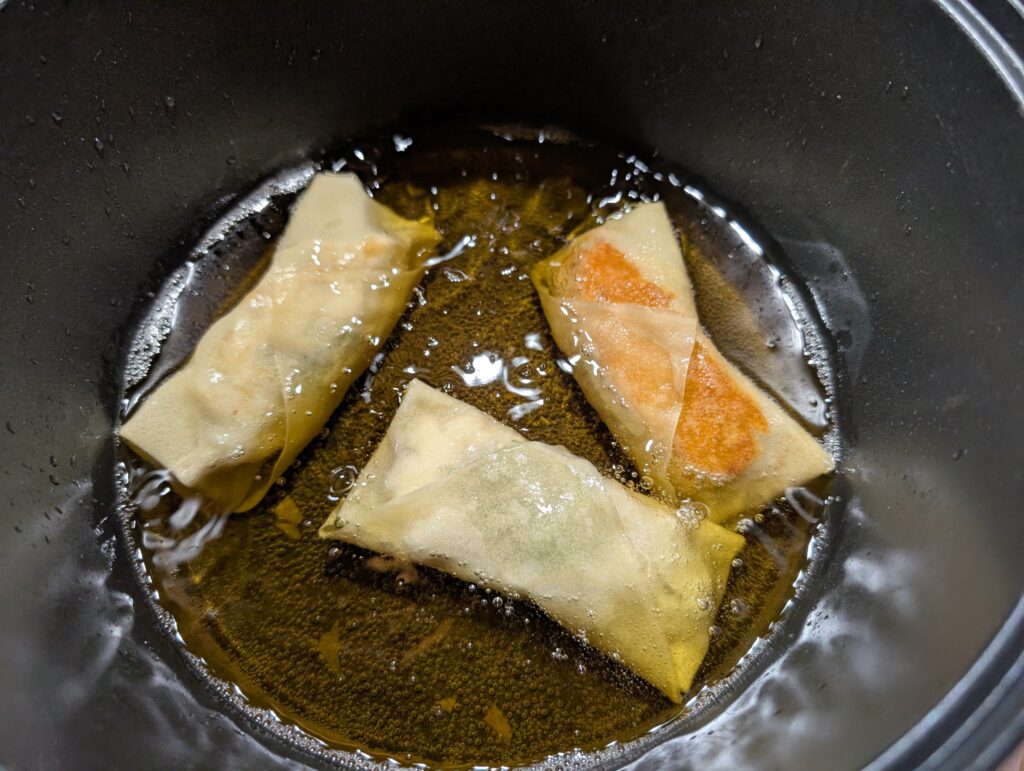
- Step 6: Heat oil in a deep pot, using enough oil so the spring roll will not sit too close to the bottom of the pan, which can cause uneven coloring and texture.
- Step 7: When the oil reaches about 150°C / 302°F, gently slide the spring roll into the oil. Allow the moisture to slowly evaporate and the air pocket to form. For the first 30 seconds to 1 minute, avoid touching the roll or letting it hit the pan, as this stage is critical for shaping.
- Step 8: Gently ladle hot oil over the exposed surface of the spring roll to help inflate the air pocket. Avoid pouring repeatedly in one spot; distribute the oil evenly to prevent dents and uneven coloring.
- Step 9: Gradually increase the oil temperature to about 165°C / 330°F to achieve a golden exterior. Do not flip the spring roll because the top is filled with trapped air, flipping may cause the wrapper to crack or burst, splashing hot oil. If the bottom browns too quickly, use a slotted spatula to gently lift the spring roll out of hot oil and use another spatula to pour hot oil only over the pale areas.
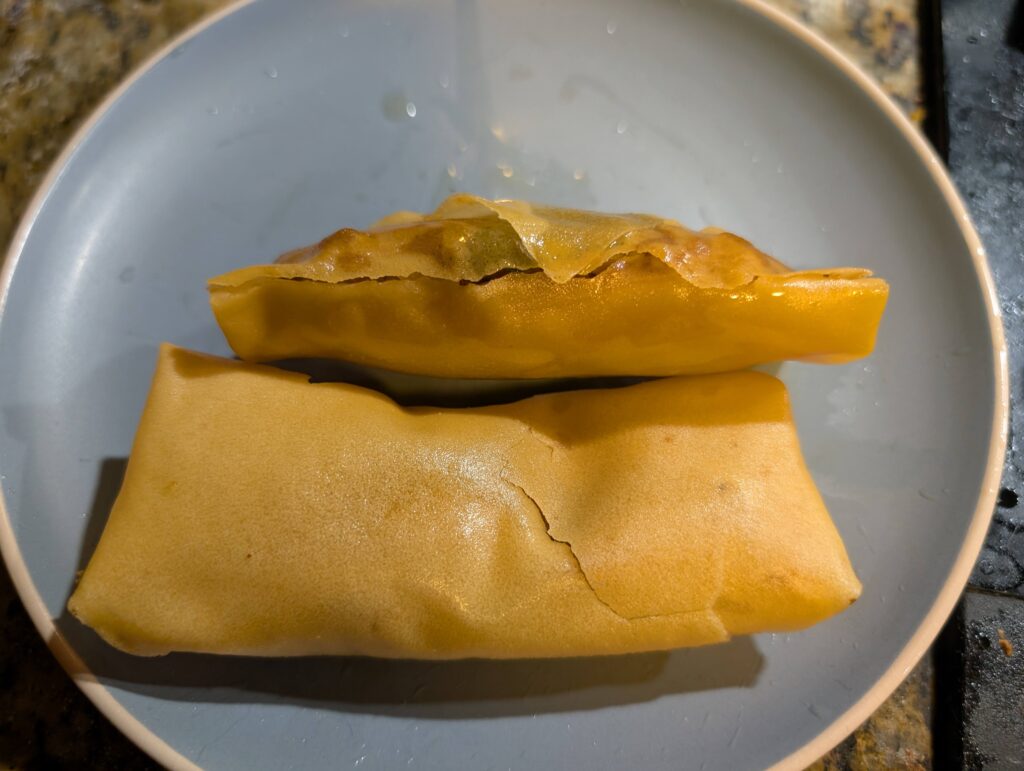
- Step 10: Once evenly golden, remove the spring roll from the oil and drain on oil-absorbing cooking paper.
- Step 11: After cooling slightly, use the heel of a knife to gently tap the center of the air pocket. Slowly extend the crack upward and downward. Once the crack runs along most of the roll, carefully slice it open and serve.


Common mistakes:
READY TO SERVE!!